How to Bring Old Decking Back to Life? – Value Sundecks
A weathered, grey, or splintering deck is a common sight in South Africa, but it doesn’t always signal the end of its lifespan. Often, the silver-grey patina that develops on sundecks is merely surface-level oxidation caused by our intense UV radiation and dramatic seasonal shifts. If the structural skeleton the joists and bearers underneath remains solid, you can save a significant amount of money by learning how to bring old decking back to life through a professional restoration process rather than a full replacement.
Reviving a deck is a labor of love that requires more than just a quick splash of water. It involves a systematic approach to deep cleaning, mechanical preparation, and high-quality protection to ensure the wood remains supple and safe for years to come.
1. The Assessment: Safety First
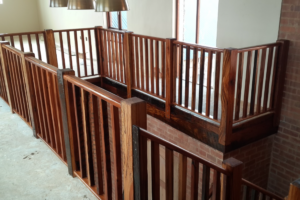
Before you pick up a brush, you must determine if the deck is a candidate for restoration. A timber deck revival starts with a structural audit. Walk the entire surface and look for “bouncing” boards or sagging areas.
Perform the “Pick Test”: take a small flat-head screwdriver and press it into any areas that look dark, damp, or suspicious. If the wood feels firm, it is likely just surface weathering. If the screwdriver sinks in like it’s hitting butter, you have wood rot. While individual boards are easily replaced, widespread rot in the sub-frame may require professional intervention. Check all fasteners; if nails are popping or screws are rusted through, they will need to be addressed before the sanding phase.
2. The Deep Clean: Removing the Grime
The first physical step in how to bring old decking back to life is removing the biological film that accumulates over time. Dust, algae, bird droppings, and old, flaking sealer trap moisture against the wood, accelerating decay.
- Debris Removal: Use a stiff broom or a high-pressure air hose to clear the gaps between the planks. Blocked gaps prevent airflow and drainage, which are the primary causes of joist rot.
- Oxygen Bleach Cleaners: Avoid harsh chlorine-based bleaches which can damage wood fibers and kill your garden. Instead, use an oxygen bleach cleaner (sodium percarbonate). This lifts deep-seated dirt and kills fungal spores while being environmentally friendly.
- The Pressure Washer Debate: While a pressure washer is a great tool, it must be used with extreme caution. Set it to a wide fan spray and keep the nozzle moving. If you hold it too close to the wood, you will “fuzz” the grain, tearing the lignins and making the sanding process much more difficult.
3. Mechanical Preparation: Deck Sanding and Sealing
Once the deck is thoroughly dry which can take 24 to 48 hours in South Africa’s humidity—the real transformation begins. Deck sanding and sealing is the most critical phase of restoring weathered wood.
Sanding removes the dead, grey surface cells to reveal the vibrant, natural oils and colors of the timber beneath. For most residential decks, you will need a heavy-duty orbital sander.
- Grit Progression: Start with a coarse 40 or 60-grit sandpaper to level out warped boards and strip away the oxidation. Follow this with an 80 or 100-grit paper to smooth out the grain.
- Edge Work: Use a smaller detail sander for corners and areas around balustrades where the large machine cannot reach.
- Fastener Check: Ensure all screws or nails are countersunk (driven slightly below the surface) before you begin. A single protruding nail head can ruin an expensive sanding belt in seconds.
4. Structural Repairs and Board Replacement
With the surface now bare and clean, any defects are easily visible. This is the time for fixing a grey deck properly. If you identified soft boards during your initial assessment, pry them up and replace them with the same species of wood—whether that is CCA treated pine or a hardwood like Balau or Garapa. Ensure the new boards are cut to fit tightly and are fastened with high-quality stainless steel or galvanized screws to prevent future rust streaks.
5. Choosing and Applying the Best Treatment
The final and most rewarding step is applying the protective barrier. In the South African climate, the choice of product is vital. We strongly recommend penetrating timber oils over surface-level varnishes or “deck stains” that sit on top of the wood.
- Why Oil? Penetrating oils soak deep into the timber fibers, keeping them flexible and preventing the wood from becoming brittle and cracking. Unlike varnish, oil will not peel or flake when exposed to high heat.
- The Importance of Pigment: While “Clear” sealers are popular, they provide almost no UV protection. Choose a tinted oil (such as Oak, Teak, or Mahogany). The pigments act as “sunscreen,” reflecting UV rays and preventing the wood from turning grey again within a few months.
- Application: Apply the oil using a high-quality brush or a specialized deck applicator pad. Work in the direction of the grain, ensuring you coat the ends of the boards, as these are the most porous areas. Apply two coats, allowing the first to soak in completely before adding the second.
Conclusion

Learning how to bring old decking back to life is one of the most cost-effective ways to increase your property’s curb appeal and extend the life of your outdoor living area. A professional restoration doesn’t just make the deck look like new; it seals it against the elements, protects your family from splinters, and ensures the structural integrity remains intact for years to come.
If your deck has reached the point where a simple sweep isn’t enough, don’t rush to the demolition phase. Follow this systematic revival process and watch your weathered timber transform back into a stunning hardwood masterpiece. Contact value sundecks now!